
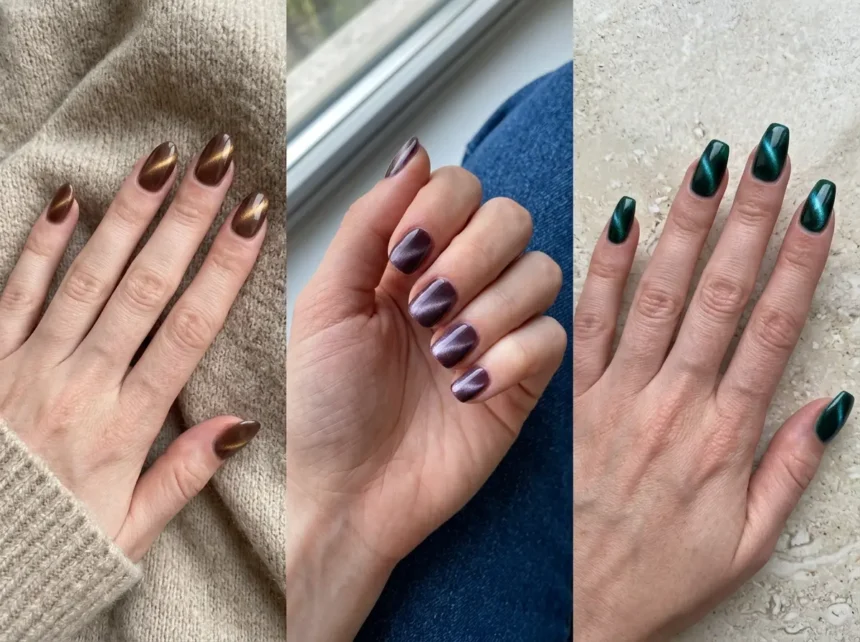
The hardest part of cat eye nails is getting the shimmer to stay exactly where you want it. You hold the magnet over the polish, a bright stripe appears, and then it starts looking softer before the nail reaches the lamp.
- How Cat Eye Nails Get Their Shimmer
- What You Need Before You Start
- How to Do Cat Eye Nails Step by Step
- 1. Choose a Shape You Can Keep Consistent
- 2. Apply a Thin Base Coat
- 3. Decide Whether You Need a Separate Color
- 4. Paint an Even Magnetic Layer
- 5. Hold the Magnet Steady
- 6. Check the Nail From More Than One Angle
- 7. Cure Before Moving to the Next Nail
- 8. Finish With a Compatible Top Coat
- Magnet Techniques for Different Cat Eye Nail Designs
- Why Your Cat Eye Nails Aren’t Turning Out as Expected
- The Stripe Appears, Then Spreads
- Nothing Happens When You Use the Magnet
- Every Nail Looks Different
- The Magnet Keeps Touching the Surface
- The Finish Looks Dull in a Photograph
- Easy Color Combinations to Try First
- Keeping the Manicure Looking Neat
- Frequently Asked Questions
- Can I create cat eye nails without a lamp?
- Can I use the magnet after curing?
- Do cat eye nails always need black underneath?
- Do cat eye nails work on short natural nails?
- Can I fix a cat eye design before curing?
- What’s the difference between cat eye and chrome nails?
- Final Takeaway
A more consistent result comes from working on one nail at a time. Apply an even layer of magnetic gel, position the magnet while the polish is uncured, and cure promptly once you like the reflection. Keep your application thickness and magnet angle similar across the hand.
Start with a simple diagonal stripe. Once you can repeat that comfortably, softer velvet finishes and curved highlights become easier to experiment with.
How Cat Eye Nails Get Their Shimmer
Cat eye gel polish contains magnetic particles that move in response to a magnet while the product is still uncured. Their position creates the shifting reflection you see when you turn your hand.
A narrow band gives the classic cat eye appearance. A broader reflection creates a softer velvet nail effect, while other magnet positions can produce curved or off-center highlights.
The polish matters as much as the technique. Some formulas create a strong, contrasting stripe. Others give a more diffused shimmer, even with careful magnet positioning.
Ordinary glitter or metallic polish won’t produce the same effect. Look for a product specifically labeled magnetic or cat eye.
What You Need Before You Start
Have the magnet and lamp within reach before painting. You should be able to move from shaping the reflection to curing without searching through your supplies.
For a magnetic gel manicure, gather:
- A nail file
- Preparation supplies recommended by your gel system
- A compatible base coat
- A base color, if your magnetic polish requires one
- Cat eye gel polish
- A nail-art magnet
- A compatible UV/LED nail lamp
- A compatible top coat
- A small cleanup brush
- Finishing supplies specified by the manufacturer
A practice tip is helpful if this is your first attempt. You can test the magnet’s different faces and angles without having to redo a nail.
Check the product instructions before beginning. Gel polish curing times, compatible lamps, and application methods vary between systems.
How to Do Cat Eye Nails Step by Step
1. Choose a Shape You Can Keep Consistent
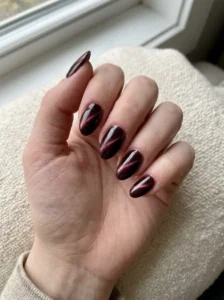
File the nails before applying any product. Compare the length and outline across the hand, paying attention to corners that catch or edges that look uneven.
Short round and squoval nails work well with a simple stripe. Oval and almond shapes give a longer surface for the reflection, but you don’t need extensions to wear this finish.
Remove the previous manicure properly and follow your gel system’s preparation directions. Avoid thinning the natural nail with heavy buffing.
2. Apply a Thin Base Coat
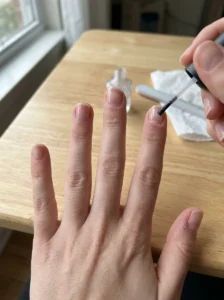
Brush on the recommended base coat, keeping it away from the surrounding skin.
Check the cuticle area and sidewalls before curing. If gel has touched the skin, remove it completely rather than curing it in place.
Use the lamp and curing time specified for the product. Keep the nail positioned correctly inside the lamp, including the thumb, which can easily tilt to one side.
3. Decide Whether You Need a Separate Color
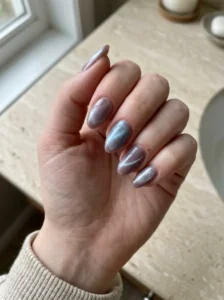
Not every cat eye polish needs a black base.
Some formulas provide their own color and coverage. Others are translucent and designed to go over another shade.
A black base can make a light magnetic stripe stand out sharply. A matching base gives a more blended finish, while a pale base may keep the manicure softer.
For example, burgundy beneath a warm magnetic shade can create a rich red result. Black beneath the same shade may make it appear much darker.
Follow the formula’s instructions and cure any separate base color before applying the magnetic layer.
4. Paint an Even Magnetic Layer
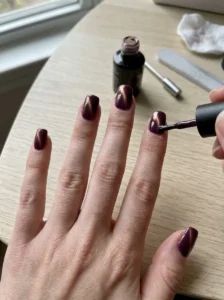
Mix the polish according to the bottle’s directions, then apply it evenly over one nail.
Aim for smooth coverage without a thick mound in the middle or pooled product along the sides. More gel doesn’t automatically mean a stronger cat eye effect.
Keep the brush movements controlled. Once the nail is covered evenly, put the brush down and pick up the magnet.
Leave this layer uncured.
5. Hold the Magnet Steady
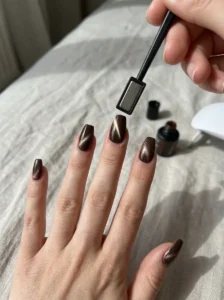
For a classic diagonal stripe, begin with the rectangular end of a nail magnet held above the surface at an angle.
Bring it close enough for the particles to respond without touching the wet gel. Use the distance and hold time recommended for your polish and magnet.
Rest your hands on the table. A supported wrist makes it easier to maintain a small gap without accidentally pressing the tool into the nail.
Watch what happens before moving the magnet again. Repeated sweeping can change the reflection faster than you can judge it.
Different magnets behave differently. Test the face and orientation that give you the line you want, then use that same position on the remaining nails.
6. Check the Nail From More Than One Angle
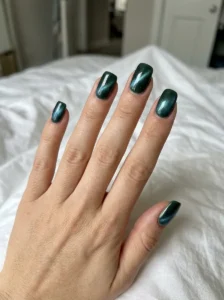
Turn the finger slightly under your working light.
A magnetic finish changes as the nail moves, so don’t judge it only from directly above. Check that the highlight is placed where you want it and that the painted edges remain clean.
If the pattern needs adjusting, do it before curing. With some formulas, you can gently smooth the uncured layer with the brush and try the magnet again.
If the magnet has left a dent, correct the surface first. A top coat won’t neatly disguise an uneven layer underneath.
7. Cure Before Moving to the Next Nail
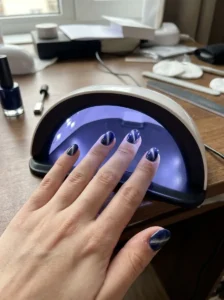
Once the reflection looks right, cure promptly using the full exposure recommended by the manufacturer.
Then repeat the process on the next nail.
Working individually gives you more control than painting and magnetizing an entire hand before curing. It also helps you notice whether your magnet angle or application thickness has changed.
Don’t shorten the curing time simply because the surface looks set. Appearance alone doesn’t confirm that the gel has cured correctly.
8. Finish With a Compatible Top Coat
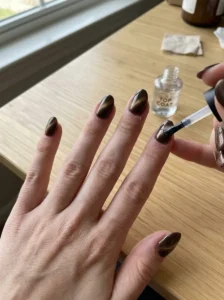
Apply an even top coat over the cured design, following the system’s instructions for sealing the free edge.
Avoid building up a thick ridge around the tip. Keep the sidewalls and cuticle outline tidy, then cure as directed.
Complete any required cleansing step and apply cuticle oil after the manicure is finished.
Magnet Techniques for Different Cat Eye Nail Designs
You don’t need several tools to begin. Learn how your polish responds to one magnet before buying more shapes.
| Design | The effect you’re aiming for | Detail to keep consistent |
|---|---|---|
| Diagonal cat eye | A bright band crossing the nail | Magnet angle |
| Vertical cat eye | A highlight running along the length | Placement over the center |
| Velvet finish | A broad, softly shifting reflection | Product-specific magnet sequence |
| Offset shimmer | Brightness concentrated toward one side | Distance from the edge |
The Classic Diagonal Stripe
A diagonal stripe gives you a clear pattern to practice.
Decide on the direction before starting the hand. Keep the angle similar from nail to nail so the finished manicure looks coordinated.
The stripe may appear narrower on a small nail and wider on a thumb. Focus on the overall direction rather than trying to make every reflection identical.
A Softer Velvet Effect
Velvet nails have a wider field of shimmer instead of one sharply defined line.
The method depends on the formula and magnet. Follow the product’s demonstration for positioning the tool around the nail rather than assuming the classic stripe technique will create the same result.
Check the reflection as you move your finger. Once you like the soft glow, stop adjusting and cure.
An Off-Center Highlight
A reflection placed toward one side can make a simple solid manicure look more dimensional.
Keep the placement deliberate. If the highlight sits near the left edge on one nail and near the right edge on the next, the result may look accidental.
Practice the position on a tip first, especially if you’re working with a strong magnet.
Why Your Cat Eye Nails Aren’t Turning Out as Expected
The Stripe Appears, Then Spreads
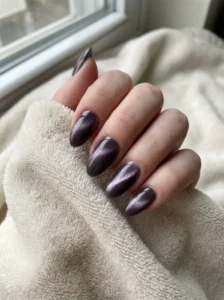
Try reducing the delay between magnetizing and curing. Keep the lamp ready and finish one nail at a time.
Also check that your application matches the product instructions. A heavy, uneven layer can make the design harder to control.
Nothing Happens When You Use the Magnet
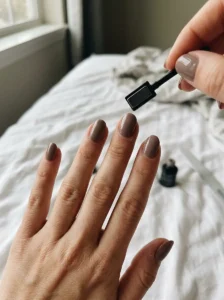
Confirm that the polish is magnetic and that the layer is still uncured.
Next, check the mixing directions and recommended magnet. Try a different face or orientation on a practice tip before adding more polish.
Every Nail Looks Different
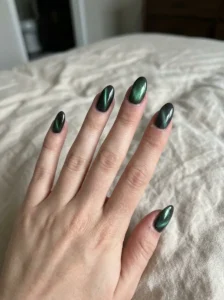
Compare four details: the amount of gel, the magnet angle, its distance from the nail, and how long you wait before curing.
Change one thing at a time. Otherwise, you won’t know which adjustment helped.
The Magnet Keeps Touching the Surface
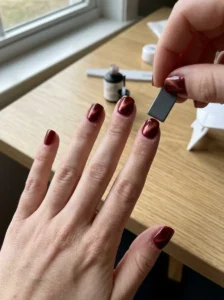
Support both hands and move the tool into position slowly.
You can practice holding the magnet above an unpainted tip first. Getting comfortable with the gap is easier when there’s no wet polish to disturb.
The Finish Looks Dull in a Photograph
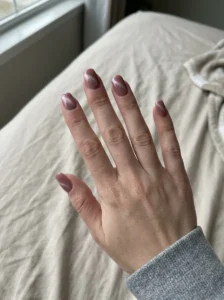
Turn your hand under the light before deciding the effect has failed.
Magnetic shimmer is directional. A straight-on photo can miss the reflection that becomes obvious when the finger tilts.
Easy Color Combinations to Try First
Choose a simple color combination while learning the technique.
Chocolate with bronze shimmer gives a warm finish. Navy with a silver band creates stronger contrast. Burgundy with a rose-toned reflection looks rich without needing additional art.
For something lighter, try a pink magnetic formula designed to create a soft velvet appearance.
An accent nail is another practical starting point. Keep the rest of the manicure in a matching solid color and practice the magnetic effect on one or two nails.
Leave detailed French tips and layered patterns until you feel comfortable controlling the shimmer.
Keeping the Manicure Looking Neat
Wear gloves during cleaning and avoid using your nails to lift lids or pry open packaging.
Don’t pick at lifting gel. If a nail catches or the product separates, arrange a repair or remove it according to the system’s directions.
For the next set, make a quick note of the base shade, magnetic polish, and magnet position you used. Repeating a successful combination is easier than trying to remember it several weeks later.
Frequently Asked Questions
Can I create cat eye nails without a lamp?
You can use an air-drying magnetic nail lacquer without a curing lamp. Magnetic gel polish requires its compatible lamp. Follow the instructions for the formula you have.
Can I use the magnet after curing?
No. The magnetic pattern needs to be shaped while the layer is uncured. Once it has set, the magnet won’t rearrange that layer.
Do cat eye nails always need black underneath?
No. Some formulas work alone, while others need a separate base color. Black is one option for stronger contrast, not a requirement for every manicure.
Do cat eye nails work on short natural nails?
Yes. A diagonal stripe or soft velvet effect can work well on short nails. Choose a manageable shape and keep the product outline clean.
Can I fix a cat eye design before curing?
Often, yes. Depending on the product, you can smooth the uncured layer and use the magnet again. Correct any dents or skin contact before curing.
What’s the difference between cat eye and chrome nails?
Cat eye polish uses a magnet to position reflective particles before the layer sets. Chrome manicures commonly use powder applied over a prepared surface. They create different types of reflection and follow different application methods.
Final Takeaway
For more consistent cat eye nails, keep the process simple: apply an even magnetic layer, hold the magnet steadily, check the reflection, and cure promptly.
Work on one nail at a time and repeat the position that gives you the result you like. A clean diagonal stripe is enough for a striking manicure, and it gives you a useful starting point for trying softer velvet effects later.
Our Editorial Approach
Beauty and self-care information should be clear and easy to use. Our goal is to help you understand your options and make more informed choices about your everyday routine.
Our articles are for educational purposes only and do not replace advice from a qualified healthcare professional.