
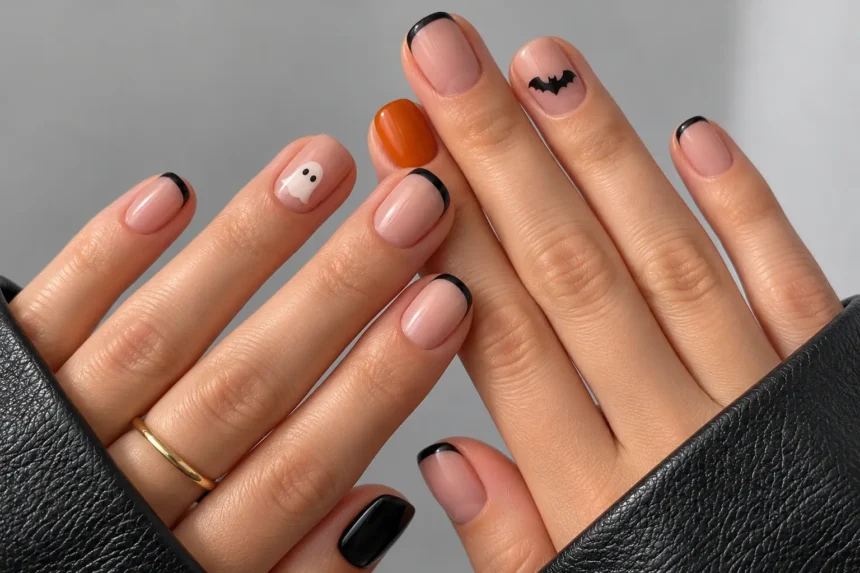
A tiny ghost, a fine black tip, or a few pumpkin-orange dots can give short nails a Halloween feel without covering the whole surface. The clearest designs leave enough space around each detail so you can recognize it at a glance.
Short Halloween nails work well with small motifs and simple color combinations. Choose one main detail, repeat it on a couple of nails, and keep the rest solid or sheer. You don’t need extensions or a different pattern on every finger.
These 12 ideas range from plain seasonal colors to compact nail art you can adapt to the length you already have.
Short Halloween Nails at a Glance
| Nail idea | Main colors | Suggested shape | Overall effect |
|---|---|---|---|
| Black micro French tips | Black and sheer pink | Round or squoval | Minimal and defined |
| Tiny ghost accents | White, black, and nude | Short oval | Playful |
| Pumpkin-orange dots | Orange and sheer beige | Round | Simple and colorful |
| Black and orange alternating nails | Black and orange | Square or squoval | Bold without detailed art |
| Fine spiderweb corner | Black and nude | Square | Graphic |
| Burgundy with a crescent moon | Burgundy and silver | Oval | Dark and understated |
| Small black bats | Black and pale gray | Squoval | Recognizably Halloween |
| Candy corn tips | White, orange, and yellow | Short square | Bright and playful |
| Black cat accent nail | Black and sheer pink | Round or oval | Cute with one focal point |
| Smoky charcoal nails | Gray and black | Squoval | Soft and shadowy |
| Green slime tips | Green and nude | Round or square | Colorful and graphic |
| Tiny starry midnight nails | Navy and silver | Short oval | Celestial |
Use the shape suggestions as a starting point. You can usually adjust the scale and placement of the art to suit your existing nails.
1. Black Micro French Tips
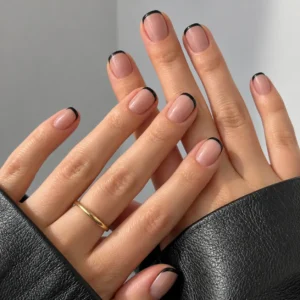
A narrow black line along the free edge gives a short manicure a dark detail while leaving most of the nail light.
Start with clear polish, sheer pink, or a soft beige base. Keep the black tip fine enough that it reads as an edge rather than a large block of color.
Follow the curve of round nails or use a straighter line on square tips. Compare the width across the hand before finishing.
If you want one extra detail, add a tiny orange dot to an accent nail.
Best for: A subtle Halloween manicure with very little painting.
2. Tiny Ghost Accent Nails
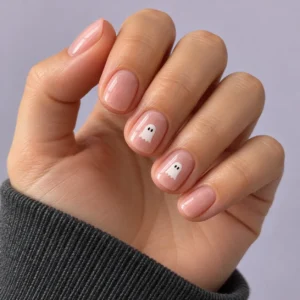
A small white ghost stands out over a sheer nude base without needing much space.
Paint a rounded white shape with a slightly uneven lower edge, then add two tiny black eyes. A mouth is optional; leaving it out keeps the face clearer on a small nail.
Use the ghost on one or two nails and paint the rest black, pale pink, or milky white.
Let the white polish dry before adding the eyes if you’re using regular lacquer. Otherwise, the black can drag into the shape.
Best for: Cute Halloween nail art with one easy-to-recognize detail.
3. Pumpkin-Orange Polka Dots
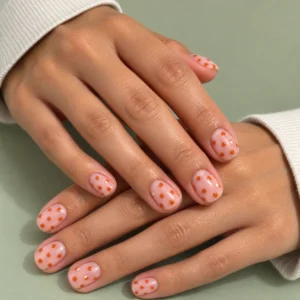
Orange dots give you a seasonal manicure without drawing complete pumpkins.
Place a few small circles over a clear or sheer beige base. Keep them similar in size and leave open space between them.
For a pumpkin accent, add a short green or brown stem to just one dot. There’s no need to put a face on every circle.
A dotting tool helps with consistency. Test the amount of polish on a practice surface before touching the nail.
Best for: Beginners who want a simple orange design.
4. Alternating Black and Orange Nails
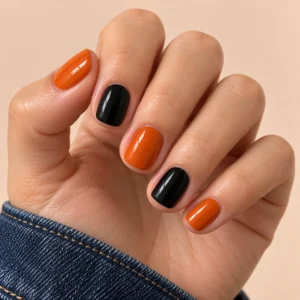
Alternating solid colors is one of the simplest ways to create short Halloween nails.
Choose a pumpkin orange for a traditional combination or a muted burnt orange for a quieter result. Glossy black gives both versions a clear contrast.
You can alternate every nail or use orange on only two fingers. Keep the shape and finish consistent so the set feels coordinated.
Pay attention to the painted outline. With no nail art to draw the eye, tidy edges make a noticeable difference.
Best for: A full Halloween manicure without detail work.
5. A Spiderweb in One Corner
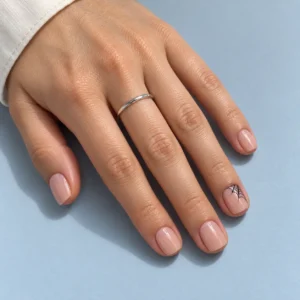
A small spiderweb can sit near the tip or along one side of a short nail.
Use a sheer base and draw two or three fine lines spreading from the corner. Connect them with a few curved strokes, leaving the rest of the nail uncovered.
The lines need to remain narrow. Thick strokes can merge and hide the web’s shape.
Keep the web on one accent nail, with plain black on the others. A ready-made decal is another option if fine brushwork feels difficult.
Best for: A graphic design that uses only part of the nail.
6. Burgundy Nails With a Silver Crescent
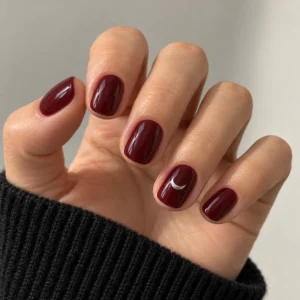
Deep burgundy gives the manicure a dark base while keeping a little red visible in brighter light.
Add one small silver crescent to an accent nail. Place it slightly off-center so there’s enough burgundy around the curve to define it.
Keep the remaining nails plain and glossy. The color and single moon provide enough detail for an understated Halloween look.
For a lighter version, put the crescent over a sheer base and reserve burgundy for the surrounding nails.
Best for: A dark manicure you can comfortably wear beyond Halloween.
7. Small Black Bats
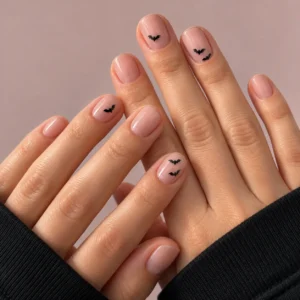
A black bat silhouette works best when the background gives it clear separation. Try milky gray, pale lavender, or sheer pink.
Keep the shape compact: a small center with one wing extending to each side. Avoid adding detailed faces or several overlapping bats.
Place one bat near the middle or tip of an accent nail. Check that both wings fit before you begin painting.
If you’re using a decal, choose one sized for the nail rather than trimming away most of its outline.
Best for: A recognizable Halloween motif with limited decoration.
8. Candy Corn Tips
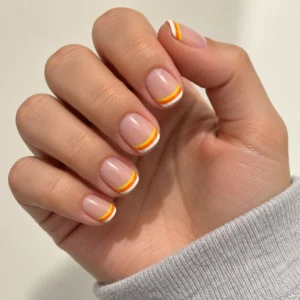
Candy corn colors create a bright edge using white, orange, and yellow.
On short square nails, use narrow bands across the tip. Keep the colored section small enough that some neutral base remains visible.
Another option is one tiny candy corn triangle on an accent nail. That gives you the three colors without repeating several bands across the hand.
Use a fine brush and let each color dry before painting beside it with regular polish.
Best for: A playful Halloween manicure with lighter colors.
9. A Black Cat Accent Nail
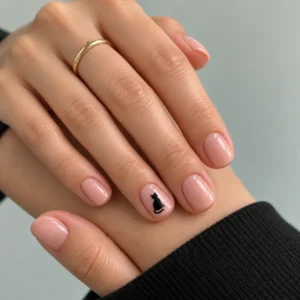
A simple cat head needs only a rounded black shape, two pointed ears, and small contrasting eyes.
Place it near the free edge over a sheer pink or beige base. The ears can extend slightly above the head while the lower shape follows the tip.
Skip whiskers if the nail is too small for them to remain distinct. Two eyes may be enough to finish the design.
Pair the accent with plain black nails or black micro French tips.
Best for: A cute focal point on short round or oval nails.
10. Smoky Charcoal Nails
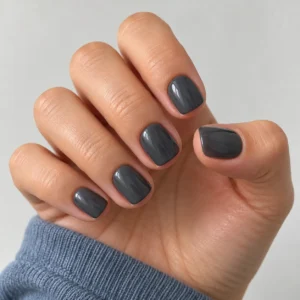
Charcoal gives you the depth of a dark manicure with a softer appearance than solid black.
Wear it as a plain glossy shade or blend a little black near the tips. Keep the transition subtle so the result looks smoky rather than striped.
On very short nails, a single charcoal color may be clearer than a complicated gradient.
A fine silver shimmer on one accent nail can add reflection without covering the set in glitter.
Best for: A shadowy Halloween look without painted characters.
11. Green Slime Tips
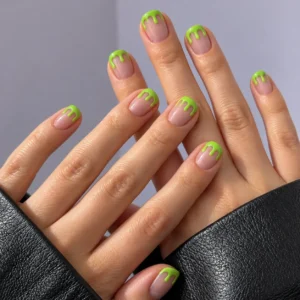
Green slime tips use an irregular dripping edge instead of a clean French line.
Start with a sheer base, then paint a narrow green section along the tip. Extend two or three rounded drips downward at different lengths.
Leave space between the drips. If they’re too wide or too long, they can cover most of a short nail.
Choose bright green for a noticeable result or a deeper moss shade for something more muted. Repeat the color on a plain accent nail if you want to simplify the set.
Best for: Colorful nail art with a loose, uneven outline.
12. Midnight Blue Nails With Tiny Stars
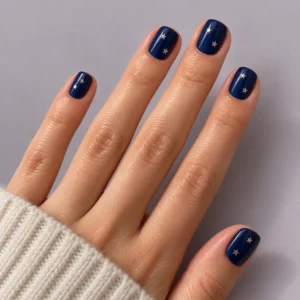
Midnight blue gives a dark manicure a hint of color. Small silver stars add a celestial detail that suits Halloween without relying on pumpkins or ghosts.
Use one tiny four-point star and a few dots on an accent nail. Leave the other nails plain navy.
Keep the metallic details separated so each remains visible. A dense glitter layer can hide the blue and make the painted stars harder to distinguish.
This design also works over a sheer base with navy French tips if you want less dark coverage.
Best for: A simple celestial manicure with a cool color palette.
How to Keep Halloween Art Clear on Short Nails
Choose the main motif before deciding how many extras to add.
A ghost with two eyes is easy to recognize. A ghost beside a pumpkin, moon, web, and several stars may become crowded on the same small nail.
Start with one accent nail. Once you’ve checked the scale, decide whether the design needs repeating elsewhere.
Leave a visible margin around the artwork. That open space helps separate the shape from the nail’s edges and surrounding color.
The thumb can hold a larger motif than the little finger. Keep the theme consistent without forcing identical artwork onto every nail.
What You Need for Simple Halloween Nail Art
You can begin with your usual manicure supplies and a small selection of colors.
- A nail file.
- A base coat suited to your polish.
- Two or three polish colors.
- A fine nail-art brush or dotting tool.
- Small decals, if you prefer them to painting.
- A cleanup brush.
- A compatible top coat.
Choose tools according to the design. Dots need a rounded tip, while webs and French lines are easier to control with a fine brush.
Practice the motif on a nail tip before painting the hand. It’s a useful way to check whether the detail fits the available space.
Getting a Neat Finish
Shape the nails before applying polish and compare the outline across the hand.
Apply controlled color layers, following the product’s directions. Keep the sidewalls and cuticle area tidy, especially with black or other deep shades.
For regular polish, allow the base color to dry before adding art. Give the details time to dry before applying top coat so the brush doesn’t pull them into the background.
For gel, follow the specific product and lamp instructions. Remove any uncured gel from the surrounding skin before curing.
If a small design goes wrong, correct that area rather than covering it with more decoration. Extra layers can make the motif harder to read.
Common Short Halloween Nail Mistakes
Choosing Artwork That Is Too Large
A decal or painted motif needs enough room for its outline. Scale it down or use a simpler version.
Using Too Many Colors
Two contrasting shades can create a complete design. Add another only when it helps define the motif.
Making Fine Lines Too Thick
Spiderwebs, whiskers, and star points can merge when the brush carries too much polish. Test the line first.
Repeating Detailed Art on Every Nail
Plain nails give the accents room to stand out. A coordinated set doesn’t require ten decorated surfaces.
Conclusion
Short Halloween nails don’t need elaborate artwork. A fine black tip, pumpkin-orange dots, or one small ghost can give a simple manicure a clear seasonal detail.
Choose one main idea, scale it to your nails, and leave enough space around it. Tidy color and a recognizable accent are enough to make the design feel finished.
Frequently Asked Questions
Which Halloween nail design is easiest to try at home?
Alternating black and orange nails is a straightforward starting point. Small orange dots over a sheer base add a little art without fine line work.
Can very short nails still have Halloween designs?
Yes. Tiny dots, a single ghost, narrow French tips, or one small decal can fit. Choose the detail according to the space available.
Do Halloween nails need black polish?
No. Burgundy, navy, charcoal, orange, lavender, and green can all work. The motif can carry the Halloween theme.
Are decals easier than painting?
They can be useful for detailed shapes such as bats or webs. Check their size and follow the application instructions for the specific decals.
Can I create these designs with regular polish?
Yes. These ideas can be adapted to regular nail polish. Let the layers dry before adding details and finishing with top coat.
What should I ask for at the salon?
Specify the length, shape, colors, and amount of art. For example: “Short squoval nails with a sheer pink base and tiny white ghosts on two accent nails.”
Our Editorial Approach
Beauty and self-care information should be clear and easy to use. Our goal is to help you understand your options and make more informed choices about your everyday routine.
Our articles are for educational purposes only and do not replace advice from a qualified healthcare professional.