

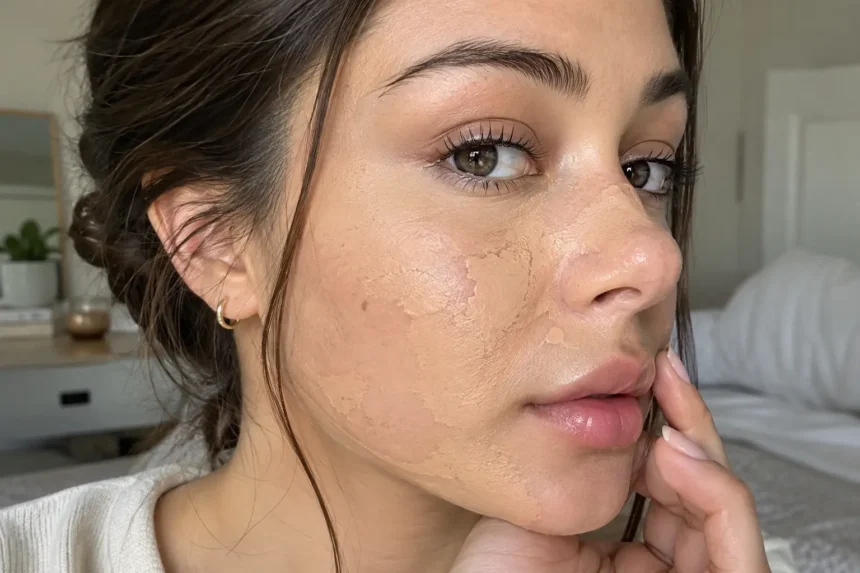
Foundation can look smooth on your forehead and uneven around your nose, even when you’ve applied primer everywhere. Adding another layer often makes those spots heavier without improving the coverage.
- What Your Patchy Foundation Is Telling You
- Why Foundation Looks Patchy Even With Primer
- 1. Your Skin Has Dry Areas Underneath
- 2. You’re Applying Too Much Primer
- 3. Your Skincare Hasn’t Settled
- 4. The Products Don’t Layer Well Together
- 5. You’re Using More Foundation Than You Need
- 6. You Keep Blending After the Foundation Starts Setting
- 7. Your Tool Is Moving the Makeup Around
- 8. Oil or Friction Is Breaking Down the Finish
- How to Apply Foundation for a More Even Finish
- 1. Check Your Bare Skin
- 2. Keep Preparation Simple
- 3. Apply Primer Selectively
- 4. Start With Less Foundation
- 5. Add Coverage Only Where Needed
- 6. Set the Areas That Need It
- How to Fix Patchy Foundation Without Starting Over
- If It Looks Dry or Heavy
- If the Products Are Pilling
- If Coverage Has Worn Away
- If Powder Has Made It Look Uneven
- Common Mistakes That Make Patchiness Worse
- Buying a New Primer Before Checking the Routine
- Treating Every Area of the Face the Same
- Exfoliating Every Time Makeup Looks Uneven
- Expecting Setting Spray to Repair the Base
- Frequently Asked Questions
- Can foundation look better without primer?
- Why does foundation look patchy around my nose?
- Does patchy foundation mean I have dry skin?
- Should I use a brush or sponge?
- Why does foundation become patchy after powder?
- Will a hydrating primer fix dry patches?
- Final Takeaway
Primer only addresses part of the problem. Foundation may still look patchy because it’s catching on dry skin, sitting over too much skincare, lifting during blending, or separating as oil builds up. The timing matters: patchiness during application usually needs a different fix from makeup that breaks apart several hours later.
Before replacing your foundation, look closely at the uneven areas. Flakes, little product rolls, brush marks, and bare spots can look similar from a distance, but they give you different clues about what to change.
What Your Patchy Foundation Is Telling You
Check your makeup in natural light before adding more product. Notice whether the foundation has collected on the skin, rolled off it, or disappeared from particular areas.
| What you notice | What to check first | A useful adjustment |
|---|---|---|
| Color clinging to visible flakes | Dry or peeling skin | Moisturize and use less coverage there |
| Small rolls appearing while blending | Product pilling | Simplify the layers and reduce rubbing |
| Streaks following the brush | Application technique | Use smaller amounts and lighter pressure |
| Bare spots appearing immediately | Foundation lifting during blending | Stop repeatedly working over the same area |
| Makeup breaking apart later | Oil, sweat, or friction | Blot gently before touching up |
| Heavy patches after powder | Too much setting product | Powder only where needed |
These are starting points rather than a diagnosis. Change one part of your routine at a time so you can see which adjustment helps.
Why Foundation Looks Patchy Even With Primer
1. Your Skin Has Dry Areas Underneath
Primer can soften the appearance of texture, but it doesn’t remove loose flakes. Foundation may collect around them, making a dry patch more noticeable than it was on bare skin.
This often shows around the mouth, beside the nose, or on the cheeks. A matte finish can make the contrast especially obvious.
Apply a moisturizer that feels comfortable on your skin and give it time to settle before makeup. On flaky areas, start with a lighter layer of foundation rather than trying to cover the texture completely.
Avoid scrubbing the patch immediately before applying makeup. If the skin is already uncomfortable or peeling, aggressive preparation can leave you with an even more difficult surface.
2. You’re Applying Too Much Primer
A thicker layer of primer doesn’t necessarily create a smoother base. Depending on the formula, it can leave an uneven or slippery surface that makes foundation harder to distribute.
Follow the product’s application directions. Spread a small amount evenly rather than leaving a visible layer around the nose or cheeks.
You may also need primer only in certain places. A pore-blurring product around the nose doesn’t automatically need to go over dry outer cheeks.
3. Your Skincare Hasn’t Settled
Moisturizer, sunscreen, and primer can leave different finishes. If you apply foundation while the layers underneath are still moving around, your brush may drag everything together.
There isn’t one waiting time that suits every routine. Follow product directions and notice how the surface feels. It should be ready for makeup rather than coated in visibly pooled product.
Keep sunscreen at its recommended amount. If the routine feels too heavy, simplify optional skincare layers or choose formulas that wear more comfortably beneath makeup.
4. The Products Don’t Layer Well Together
A primer and foundation can each work well separately but give an uneven result together.
The familiar advice to match “water-based” products with other water-based products is too simple to explain every combination. Many formulas contain both water and silicones, so the first ingredient alone doesn’t tell you how they will behave on your face.
A small wear test is more useful than guessing from the label.
On a day when you have time to experiment, keep your skincare the same and compare foundation with primer on one side and without it on the other. Check both sides immediately and later.
If the primed side looks worse repeatedly, try less primer or a different combination before buying another foundation.
5. You’re Using More Foundation Than You Need
A large amount of foundation can collect around pores, folds, and dry areas. It may look like uneven coverage when the real problem is uneven thickness.
Start with a light layer. Add a little more only where the color still needs evening out.
For a small blemish or a mark, targeted concealer may be easier to control than another full layer of foundation. Leave areas that already look smooth alone.
6. You Keep Blending After the Foundation Starts Setting
Some foundations become difficult to move quite quickly. Applying dots across the whole face, then returning to the first area several minutes later, can leave you dragging partially set makeup.
Work in sections if your formula sets fast. Blend one cheek before moving to the other, then finish the forehead, nose, and chin.
Once the layer looks even, stop. Repeated brushing can lift coverage and create bare patches that tempt you to keep adding more.
7. Your Tool Is Moving the Makeup Around
A sponge that’s dripping wet can disturb the base. A brush loaded with old product can distribute fresh foundation unevenly.
Use a clean tool. If your sponge is designed for damp use, wet it and squeeze it thoroughly so it feels damp rather than saturated.
Press gently around textured areas instead of repeatedly sweeping across them. With a brush, use light pressure and check the result before making another pass.
The best tool is the one that works with your formula. A foundation that applies smoothly with a brush may need a different approach with a sponge.
8. Oil or Friction Is Breaking Down the Finish
Foundation that looks good initially but becomes patchy later needs a wear-time adjustment.
Check where the change happens. A shiny nose may need blotting, while missing coverage beneath glasses or around the mouth may come from repeated contact.
Press away excess oil before adding powder. Putting powder straight over a shiny, uneven layer can make the patch look thicker.
For friction, a thinner application in the affected area may be easier to maintain than heavy coverage.
How to Apply Foundation for a More Even Finish
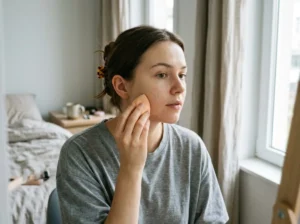
You don’t need to replace every product at once. Begin with a simpler version of your usual routine.
1. Check Your Bare Skin
Notice where the skin feels dry, looks flaky, or becomes oily. Prepare those areas according to what they need.
If the skin is sore or visibly irritated, avoid trying to hide it beneath several heavy layers.
2. Keep Preparation Simple
Use moisturizer as needed and sunscreen for daytime wear. Reduce optional layers if they repeatedly leave the surface sticky or cause products to roll up.
Let each product settle according to its directions.
3. Apply Primer Selectively
Use a thin, even amount. Focus on the areas where you’ve seen a benefit from that particular primer.
Leave it out of areas where it consistently makes foundation harder to blend.
4. Start With Less Foundation
Apply a small amount to one section and blend it before moving on.
Look at the coverage in daylight if possible. Indoor lighting can make you add more than you need.
5. Add Coverage Only Where Needed
Use a little extra foundation or concealer on specific areas. Avoid covering the entire face again because one cheek needs more coverage.
6. Set the Areas That Need It
Apply a light amount of powder where the makeup creases or becomes shiny.
If your cheeks already look dry, they may need less powder than your nose or forehead.
How to Fix Patchy Foundation Without Starting Over

First, stop adding product and identify the type of patch.
If It Looks Dry or Heavy
Use a clean sponge to press lightly over the area and lift some excess makeup. Don’t rub back and forth.
If foundation remains caught on visible flakes, removing that small section and reapplying less product may give a better result than another layer.
If the Products Are Pilling
Brush away loose rolls gently without continuing to scrub the base.
When pilling is widespread, restarting with fewer optional layers is often more practical than trying to conceal it. More foundation usually leaves the rolled-up product underneath.
If Coverage Has Worn Away
Blot first if the area is oily. Then apply a very small amount of foundation or concealer to the bare spot.
Blend the edges into the surrounding makeup rather than repainting the whole area.
If Powder Has Made It Look Uneven
Press gently with a clean, barely damp sponge, if suitable for your products. This may soften the powdery appearance.
Avoid soaking the area or adding several more products in an attempt to make it look dewy.
Common Mistakes That Make Patchiness Worse
Buying a New Primer Before Checking the Routine
The issue may come from the moisturizer, sunscreen, foundation amount, tool, or blending technique.
Test one change at a time. Replacing several products together makes it harder to identify what helped.
Treating Every Area of the Face the Same
Your nose and cheeks may need different preparation and setting.
You can use less powder on dry areas and reserve an oil-control primer for places that become shiny.
Exfoliating Every Time Makeup Looks Uneven
Foundation can look patchy for reasons unrelated to dead skin. More exfoliation won’t fix pilling, brush marks, or a poorly layered product combination.
If your skin is already peeling or stinging, give it a gentler routine rather than trying to polish the texture away.
Expecting Setting Spray to Repair the Base
A setting spray may change the finish or help wear, depending on the product. It won’t reliably remove flakes, correct pilling, or fill in missing foundation.
Fix the uneven area before applying your finishing products.
Frequently Asked Questions
Can foundation look better without primer?
Yes. Some foundations apply well over your usual skincare without an additional primer. Compare the results while keeping the rest of your routine consistent.
Why does foundation look patchy around my nose?
The area can have a combination of oil, dry skin, folds, and friction. Use less product, blend carefully beside the nostrils, and check whether the patchiness appears immediately or later.
Does patchy foundation mean I have dry skin?
No. Dryness is one possibility, but pilling, excess product, oil, and repeated blending can also create uneven coverage.
Should I use a brush or sponge?
Either can work. Try your foundation with a clean tool and a small amount of product. Choose the method that gives even coverage without repeated rubbing.
Why does foundation become patchy after powder?
The powder may be catching on a layer that is still uneven, or you may be applying more than the area needs. Check the foundation first, then use a light amount of powder selectively.
Will a hydrating primer fix dry patches?
It may make the application more comfortable, but it won’t remove peeling skin. Moisturizer, lighter coverage, and a gentler preparation routine may be more useful. Persistent peeling, redness, or discomfort deserves attention beyond makeup.
Final Takeaway
Foundation can look patchy even with primer because the problem may begin underneath the makeup or develop during application and wear.
Check whether you’re seeing flakes, pilling, streaks, or worn-away coverage. Then make one targeted change: simplify the preparation, use less primer, apply thinner foundation layers, or adjust how you blend and set.
A smooth-looking base usually comes from putting the right amount of product in the right places. Adding more to every uneven spot can make the finish harder to fix.
Our Editorial Approach
Beauty and self-care information should be clear and easy to use. Our goal is to help you understand your options and make more informed choices about your everyday routine.
Our articles are for educational purposes only and do not replace advice from a qualified healthcare professional.