
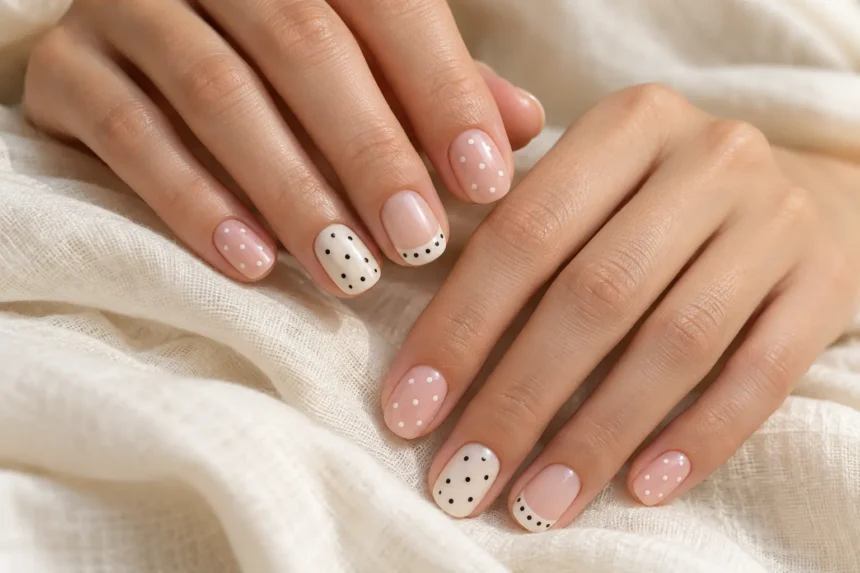
Polka dot nails can look delicate or playful depending on the size of the dots and how much space you leave between them. Tiny white dots over sheer pink give a light, understated finish. Larger black dots over a cream base create a more noticeable pattern.
You don’t need to cover every nail. A dotted accent, a fine row near the cuticle, or a few spots along a French tip can add enough detail to a simple manicure.
These 15 ideas give you different ways to wear the pattern, from short natural nails to colorful sets with a little more personality.
Polka Dot Nails at a Glance
| Nail idea | Main colors | Suggested shape | Overall effect |
|---|---|---|---|
| Classic black and white | Black and white | Short square or oval | Crisp and graphic |
| Sheer pink with white dots | Pink and white | Short round | Light and delicate |
| Nude with black dots | Beige and black | Squoval or almond | Simple and defined |
| Dotted French tips | Nude and white | Oval or almond | Detailed but restrained |
| Red with white dots | Red and white | Short square | Playful and retro |
| Pastel polka dots | Pink, lilac, mint | Round or oval | Soft and colorful |
| Chocolate and cream | Brown and cream | Squoval | Warm and understated |
| Lilac with white dots | Lilac and white | Short oval | Fresh and gentle |
| Dotted accent nail | Any matching pair | Any shape | Easy to personalize |
| Multicolored dots | Clear and bright colors | Short round | Cheerful |
| Tiny metallic dots | Nude and gold or silver | Almond or oval | Subtle and reflective |
| Pink and burgundy | Blush and wine red | Squoval or almond | Soft with deeper contrast |
| Negative-space dots | Clear and black | Short round | Minimal |
| Matte polka dots | Muted base and contrasting dots | Square or oval | Soft and graphic |
| Mixed-size dots | Two contrasting colors | Oval or almond | Loose and playful |
1. Classic Black-and-White Polka Dot Nails
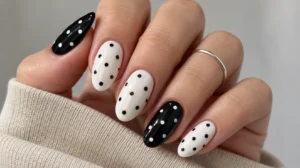
White polish with black dots gives the pattern a clear outline. Reverse the colors for a darker manicure, or alternate the two combinations across the hand.
Keep the dots small if you want a tidy, evenly spaced pattern. Larger circles create a stronger graphic effect and need more room around them.
On short nails, a few carefully placed dots can look clearer than several crowded rows.
Best for: A bold pattern using only two colors.
2. Sheer Pink Nails With Tiny White Dots
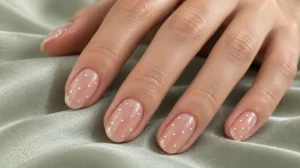
A translucent pink base keeps the natural nail visible while tiny white dots add a soft detail.
Scatter a few dots across each nail or place them on only two accent nails. Leave plenty of pink showing so the design stays light.
Choose an opaque white for the dots. A sheer white may disappear against the base unless you repeatedly go over it, which can make the circles uneven.
Best for: Short natural nails and a delicate manicure.
3. Nude Nails With Black Polka Dots
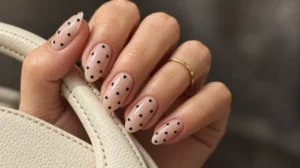
Black dots over a nude base give you contrast without a full dark manicure.
Try rosy beige, peach nude, or muted taupe according to the background you prefer. The base doesn’t need to match your skin exactly; it simply needs to give the black pattern enough separation.
A loose arrangement feels relaxed, while evenly spaced rows create a more structured result.
Best for: Neutral nails with visible nail art.
4. Polka Dot French Tips
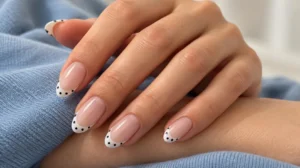
Keep the nail base sheer and place the dots within a painted French tip. White tips with tiny black dots give the familiar design a graphic detail.
The tip needs enough width for the circles to remain distinct. On very short nails, use a few small dots along the edge rather than squeezing them into a narrow band.
Leave the base plain. The patterned tip already gives the manicure its main feature.
Best for: A French manicure with a little more detail.
5. Red Nails With White Polka Dots
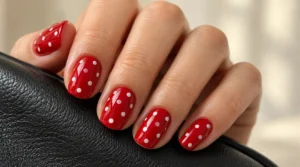
White dots against red polish create a cheerful, retro-looking manicure.
A bright cherry red makes the contrast especially clear. A deeper wine shade gives the same pattern a quieter appearance.
Try the dots on one or two nails first, with the remaining nails painted solid red. This keeps the color prominent without repeating the pattern everywhere.
Best for: A colorful manicure with a recognizable pattern.
6. Pastel Polka Dot Nails
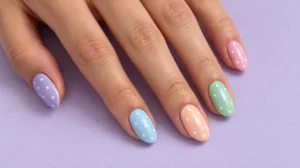
Pastel dots work well over a milky white or sheer neutral base. Choose soft pink, lilac, pale blue, or mint, then repeat those shades across the hand.
Two or three colors are enough for a coordinated set. Keep the dots similar in size so the changing colors remain the main variation.
If the pastels are difficult to see, use a less opaque base or choose slightly deeper versions of the same shades.
Best for: Soft color without a full pastel manicure.
7. Chocolate Nails With Cream Dots
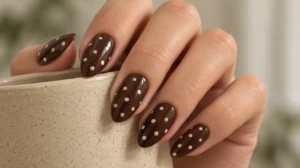
Chocolate and cream offer a warmer alternative to black and white.
Paint most nails brown, then add small cream dots to a couple of accents. You can also reverse the combination on one nail to break up the darker color.
An ivory or beige-white dot gives a gentler contrast than a stark white one.
Best for: A warm neutral manicure with simple detail.
8. Lilac Nails With White Polka Dots
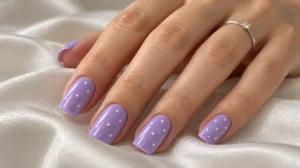
Lilac gives white dots a soft purple background without making the pattern difficult to see.
A muted lilac keeps the result understated. A brighter pastel makes the manicure more noticeable, particularly when the dots cover every nail.
Keep the circles fine and leave open space near the cuticle. A glossy finish brings the two colors together neatly.
Best for: A light purple manicure with easy nail art.
9. One Polka Dot Accent Nail
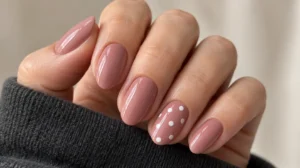
A single dotted nail is a practical starting point if you’re unsure about wearing a full pattern.
Choose a solid color for the hand, then repeat it as dots over a lighter accent base. For example, navy nails with navy dots over sheer pink keep the set connected.
You can place the accent on whichever finger you prefer. Match its shape and finish to the surrounding nails.
Best for: Trying the design without committing to a fully dotted set.
10. Multicolored Dots Over a Clear Base
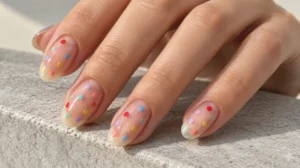
Bright dots over clear polish leave plenty of the natural nail uncovered.
Choose a small group of colors and repeat them rather than using a different shade for every dot. Coral, blue, and yellow give a cheerful combination; pink, purple, and orange create a warmer one.
Space the dots loosely. Uneven placement can look intentional when the circles themselves remain neat.
Best for: Colorful polka dot nails with a light background.
11. Tiny Gold or Silver Dots
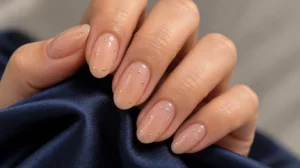
Metallic dots add a small reflection to a neutral manicure.
Place one dot near the base of each nail or scatter a few across two accents. Gold adds warmth to beige and peach, while silver gives pink and lilac a cooler detail.
Metallic polish and small nail decorations produce different finishes. Choose painted dots if you want a flatter surface.
Best for: A subtle manicure with a little shine.
12. Blush Pink With Burgundy Dots
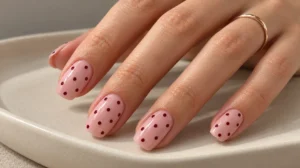
Burgundy dots give pale pink a deeper contrast without the sharpness of black.
Use a muted blush base and small wine-red circles. You can paint one nail solid burgundy to repeat the darker shade elsewhere in the set.
Avoid making the dots so large that they hide the pink background. The balance between light and dark is what makes this combination appealing.
Best for: A soft manicure with richer color.
13. Minimal Negative-Space Polka Dots
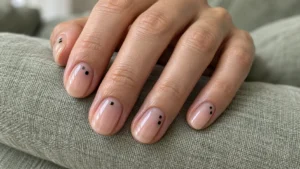
Negative-space nail art leaves part of the natural nail uncovered. For a simple dotted version, use a clear base and place a short row of dots down one side.
Keep the placement similar across the hand, even if the number of dots changes with nail size.
A single color makes the design easy to follow. Black, white, or deep red all give the dots a clear presence.
Best for: Short nails and minimal decoration.
14. Matte Polka Dot Nails
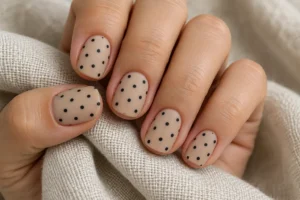
A matte finish makes a dotted manicure look less reflective and more uniform.
Try dusty blue with cream dots, muted pink with burgundy, or taupe with black. Apply a compatible matte top coat over the completed pattern if you want both colors to share the same finish.
For a different texture, keep the base matte and add glossy dots. Test the combination on a practice tip before doing the whole hand.
Best for: A patterned manicure with a muted finish.
15. Mixed-Size Polka Dots
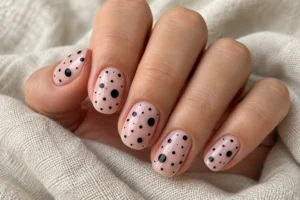
Using two dot sizes gives the pattern a looser arrangement than matching rows.
Place the larger dots first, then add smaller ones in some of the gaps. Leave other spaces empty so the design doesn’t become crowded.
Stick to two colors while experimenting with scale. That makes it easier to judge the spacing without several shades competing for attention.
Best for: A playful pattern with less rigid placement.
How to Make Polka Dot Nails Look Neat
A dotting tool helps you repeat similar circles, but the rounded end of a bobby pin can work for a simple design. Try the tool on a practice tip first to check the size it creates.
For regular nail polish:
- Apply your base color and let it dry before adding the pattern.
- Place a small drop of dotting polish on a suitable palette.
- Dip the tool lightly and touch it straight onto the nail.
- Lift vertically rather than dragging sideways.
- Refresh the polish on the tool when the dots start becoming smaller.
- Let the design dry before adding top coat.
Use light pressure. Pressing harder can spread the dot beyond the size you intended.
If you’re using gel, follow the product’s application and curing directions. Keep uncured gel off the surrounding skin.
Choosing Dot Size and Spacing
Tiny dots give short nails more room to show the background. Larger dots create a stronger pattern, but fewer may fit comfortably on each nail.
Decide whether you want rows or a scattered arrangement before starting. For rows, use the first few dots as a guide for spacing. For scattered dots, place them in separate areas before filling selected gaps.
The thumb doesn’t need the same number of dots as the little finger. Aim for a similar amount of open space across the hand.
Common Polka Dot Nail Mistakes
Adding Dots Before the Base Is Ready
The tool can disturb wet regular polish and leave a dent beneath the circle. Let the base dry before adding detail.
Loading Too Much Polish Onto the Tool
A large drop can spread into an uneven shape or leave a raised mound. Start with a small amount and test it first.
Filling Every Gap
A pattern can lose definition when the dots sit too close together. Stop occasionally and check the whole nail before adding another.
Dragging Top Coat Across Fresh Dots
A brush can pull color into the base if the pattern hasn’t dried. Allow enough drying time and apply the finishing layer with light pressure.
Final Takeaway
Polka dot nails give you plenty of room to adjust color, scale, and placement. Tiny dots over sheer pink feel delicate, while larger contrasting circles create a bolder pattern.
Start with two colors and a few well-spaced dots. A neat accent nail can be enough to make a simple manicure feel more personal.
Frequently Asked Questions
Do polka dot nails work on short nails?
Yes. Tiny dots, a single accent nail, or a short row over a sheer base all leave room for the design on shorter nails.
Can I make polka dots without a dotting tool?
A rounded bobby-pin end can work. Test it on a practice surface first because the size and shape may differ from a nail-art tool.
Which color combination is easiest to start with?
Choose two colors with clear contrast, such as nude and black or lilac and white. Keep the dot size consistent while learning the technique.
Why do my dots get smaller as I paint?
The tool carries less polish after each touch. Reload it regularly if you want similar-size circles.
Can I combine polka dots with French tips?
Yes. Put the dots inside a wider tip or use a dotted accent nail beside plain French tips. Keep enough space for each detail to remain visible.
How can I stop the dots from smearing?
For regular polish, let the pattern dry before applying top coat and use light brush pressure. For gel, follow the curing instructions for the products you’re using.
Our Editorial Approach
Beauty and self-care information should be clear and easy to use. Our goal is to help you understand your options and make more informed choices about your everyday routine.
Our articles are for educational purposes only and do not replace advice from a qualified healthcare professional.